회전 목마 플러그인
회전 목마 플러그인은 회전 목마 (슬라이드 쇼)와 같은 요소를 통해 자전거에 대한 구성 요소입니다.
팁 : 플러그인은 (사용하여 개별적으로 포함시킬 수 Bootstrap's 개인 "carousel.js" (사용, 또는 모두 한 번에 파일) "bootstrap.js" 또는 "bootstrap.min.js" ).
회전 목마 예
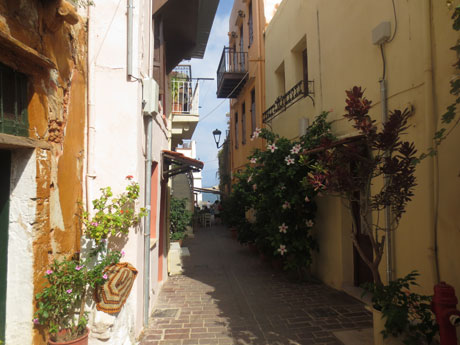
니아
니아의 분위기는 피렌체와 베니스의 손길을 보유하고 있습니다.
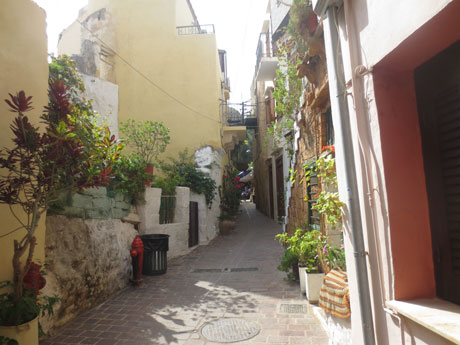
니아
니아의 분위기는 피렌체와 베니스의 손길을 보유하고 있습니다.
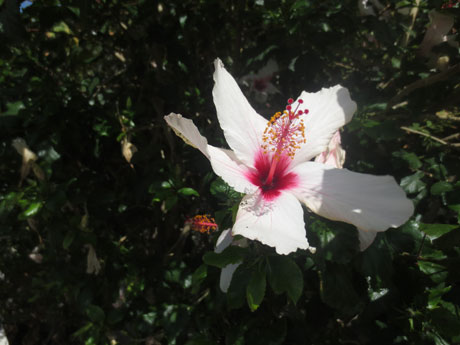
꽃들
Kolymbari, 그리스의 아름 다운 꽃.
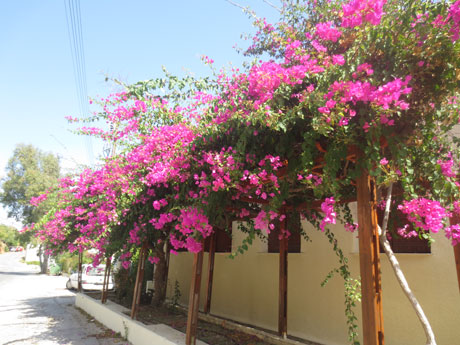
꽃들
Kolymbari, 그리스의 아름 다운 꽃.
참고 : (그들은 슬라이드 효과를 달성하기 위해 CSS3 전환 및 애니메이션을 사용하기 때문에) 캐 러셀 이전 인터넷 익스플로러 9에서 제대로 지원되지 않습니다.
어떻게 회전 목마를 만들려면
다음의 예는 기본 회전 목마를 만드는 방법을 보여줍니다 :
예
<div id="myCarousel" class="carousel slide" data-ride="carousel">
<!-- Indicators -->
<ol class="carousel-indicators">
<li data-target="#myCarousel" data-slide-to="0" class="active"></li>
<li data-target="#myCarousel" data-slide-to="1"></li>
<li data-target="#myCarousel" data-slide-to="2"></li>
<li data-target="#myCarousel" data-slide-to="3"></li>
</ol>
<!-- Wrapper for slides -->
<div class="carousel-inner"
role="listbox">
<div class="item active">
<img src="img_chania.jpg" alt="Chania">
</div>
<div
class="item">
<img src="img_chania2.jpg"
alt="Chania">
</div>
<div
class="item">
<img src="img_flower.jpg"
alt="Flower">
</div>
<div class="item">
<img src="img_flower2.jpg" alt="Flower">
</div>
</div>
<!-- Left and right controls -->
<a
class="left carousel-control" href="#myCarousel" role="button" data-slide="prev">
<span class="glyphicon glyphicon-chevron-left" aria-hidden="true"></span>
<span class="sr-only">Previous</span>
</a>
<a
class="right carousel-control" href="#myCarousel" role="button"
data-slide="next">
<span class="glyphicon glyphicon-chevron-right"
aria-hidden="true"></span>
<span class="sr-only">Next</span>
</a>
</div>
»그것을 자신을 시도 예 설명
가장 바깥 쪽 <div> :
캐 러셀 (이 경우에 아이디의 사용이 필요합니다 id="myCarousel" 회전 목마 컨트롤이 제대로 작동하기위한 참조).
class="carousel" 이되도록 지정 <div> 회전 목마가 포함되어 있습니다.
.slide 클래스는 새로운 항목을 표시 할 때 항목이 밀어 만드는 CSS 전환 및 애니메이션 효과를 추가합니다. 이 효과를하지 않으려면이 클래스를 생략합니다.
data-ride="carousel" 속성은 즉시 때 페이지가로드를 회전 목마 애니메이션을 시작하는 부트 스트랩을 알려줍니다.
은 "표시 등"부분 :
지표는 (회전 목마 거기에 얼마나 많은 슬라이드를 표시하고, 사용자가 현재보고있는 슬라이드) 각 슬라이드의 하단에있는 작은 점입니다.
지표는 클래스와 정렬 된 목록에 지정된 .carousel-indicators .
data-target 속성은 회전 목마의 ID를 가리 킵니다.
data-slide-to 특정 점을 클릭 할 때, 이동하는 슬라이드 속성에 지정된.
부분 "슬라이드에 대한 래퍼"
슬라이드는에 지정된 <div> 클래스와 .carousel-inner .
각 슬라이드의 내용이 정의되어 <div> 클래스와 .item . 이 텍스트 나 이미지가 될 수 있습니다.
.active 클래스 슬라이드 중 하나에 추가 될 필요가있다. 그렇지 않으면, 회전 목마는 표시되지 않습니다.
은 "왼쪽과 오른쪽 컨트롤"부분 :
이 코드는 "왼쪽"사용자가 수동으로 슬라이드 사이를 앞뒤로 이동 할 수 있습니다 "오른쪽"버튼을 추가합니다.
data-slide 특성 키워드 수락 "prev" 또는 "next" 의 현재 위치로의 슬라이드 위치를 변경한다.
슬라이드에 캡션 추가
추가 <div class="carousel-caption"> 각 내에 <div class="item"> 각 슬라이드에 대한 캡션을 만들려면 :
예
<div id="myCarousel" class="carousel slide" data-ride="carousel">
<!-- Indicators -->
<ol class="carousel-indicators">
<li data-target="#myCarousel" data-slide-to="0" class="active"></li>
<li data-target="#myCarousel" data-slide-to="1"></li>
<li data-target="#myCarousel" data-slide-to="2"></li>
<li data-target="#myCarousel" data-slide-to="3"></li>
</ol>
<!-- Wrapper for slides -->
<div class="carousel-inner"
role="listbox">
<div class="item active">
<img src="img_chania.jpg" alt="Chania">
<div class="carousel-caption">
<h3>Chania</h3>
<p>The
atmosphere in Chania has a touch of Florence and Venice.</p>
</div>
</div>
<div
class="item">
<img src="img_chania2.jpg"
alt="Chania">
<div
class="carousel-caption">
<h3>Chania</h3>
<p>The atmosphere in Chania has a touch of Florence and Venice.</p>
</div>
</div>
<div
class="item">
<img src="img_flower.jpg"
alt="Flower">
<div
class="carousel-caption">
<h3>Flowers</h3>
<p>Beatiful
flowers in Kolymbari, Crete.</p>
</div>
</div>
<div class="item">
<img src="img_flower2.jpg" alt="Flower">
<div class="carousel-caption">
<h3>Flowers</h3>
<p>Beatiful
flowers in Kolymbari, Crete.</p>
</div>
</div>
</div>
<!-- Left and right controls -->
<a
class="left carousel-control" href="#myCarousel" role="button" data-slide="prev">
<span class="glyphicon glyphicon-chevron-left" aria-hidden="true"></span>
<span class="sr-only">Previous</span>
</a>
<a
class="right carousel-control" href="#myCarousel" role="button"
data-slide="next">
<span class="glyphicon glyphicon-chevron-right"
aria-hidden="true"></span>
<span class="sr-only">Next</span>
</a>
</div>
»그것을 자신을 시도 완료 Bootstrap 회전 목마 참조
모든 회전 목마 옵션, 방법 및 이벤트의 완전한 참고로, 우리로 이동 Bootstrap JS 회전 목마 참조 .