إنشاء موضوع: "الشركة"
هذه الصفحة سوف تظهر لك كيفية بناء موضوع التمهيد من الصفر.
سنبدأ مع صفحة HTML بسيطة، ومن ثم إضافة المزيد والمزيد من العناصر، حتى يكون لدينا موقع على شبكة الانترنت تعمل بكامل طاقتها، والشخصية واستجابة.
فإن النتيجة تبدو هذه، وأنت حر لتعديل، حفظ، حصة، استخدام أو تفعل ما تريد مع ذلك:
HTML صفحة البداية
سنبدأ مع صفحة HTML التالية:
<!DOCTYPE html>
<html lang="en">
<head>
<title>Bootstrap
Theme Company</title>
<meta charset="utf-8">
<meta name="viewport"
content="width=device-width, initial-scale=1">
</head>
<body>
<h1>Company</h1>
<p>We specialize in blablabla</p>
</body>
</html>إضافة التمهيد كندي وإضافة Jumbotron
إضافة التمهيد كندي وتصل إلى مسج ووضع عناصر HTML داخل .jumbotron :
مثال
<!DOCTYPE html>
<html lang="en">
<head>
<title>Bootstrap
Theme Company</title>
<meta charset="utf-8">
<meta name="viewport"
content="width=device-width, initial-scale=1">
<link rel="stylesheet"
href="http://maxcdn.bootstrapcdn.com/bootstrap/3.3.6/css/bootstrap.min.css">
<script src="https://ajax.googleapis.com/ajax/libs/jquery/1.12.0/jquery.min.js"></script>
<script src="http://maxcdn.bootstrapcdn.com/bootstrap/3.3.6/js/bootstrap.min.js"></script>
</head>
<body>
<div class="jumbotron">
<h1>Company</h1>
<p>We specialize in blablabla</p>
</div>
</body>
</html>نتيجة:
شركة
ونحن متخصصون في blablabla
إضافة لون الخلفية والنص مركز
1. إضافة لون الخلفية البرتقال إلى jumbotron.
2. إضافة .text-center فئة لتوسيط النص داخل jumbotron:
مثال
<style>
.jumbotron {
background-color:
#f4511e;
/* Orange */
color: #ffffff;
}
</style>
<body>
<div class="jumbotron
text-center">
<h1>Company</h1>
<p>We specialize in blablabla</p>
</div>
</body>نتيجة:
شركة
ونحن متخصصون في blablabla
إضافة نموذج
إضافة نموذج مع حقل المدخلات وزر:
مثال
<div class="jumbotron
text-center">
<h1>Company</h1>
<p>We specialize in blablabla</p>
<form class="form-inline">
<input type="email" class="form-control" size="50" placeholder="Email
Address">
<button type="button" class="btn btn-danger">Subscribe</button>
</form>
</div>نتيجة:
شركة
ونحن متخصصون في blablabla
إضافة حاويات
إضافة حاويتين ( .container-fluid )، وإضافة فئة مخصصة للحاويات الثانية ( .bg-grey - يضيف لون الخلفية الرمادي):
مثال
<style>
.bg-grey {
background-color: #f6f6f6;
}
</style>
<div class="container-fluid">
<h2>About Company Page</h2>
<h4>Lorem ipsum..</h4>
<p>Lorem ipsum..</p>
<button
class="btn btn-default btn-lg">Get in Touch</button>
</div>
<div class="container-fluid
bg-grey">
<h2>Our Values</h2>
<h4><strong>MISSION:</strong> Our mission lorem ipsum..</h4>
<p><strong>VISION:</strong> Our vision Lorem ipsum..
</div>نتيجة:
معلومات عن الشركة الصفحة
أبجد هوز ..
أبجد هوز ..
قيمنا
المهمة: لدينا أبجد هوز مهمة ..
الرؤية: رؤيتنا أبجد هوز ..
إضافة الحشو
يتيح جعل jumbotron والحاويات تبدو جيدة عن طريق إضافة بعض الحشو:
مثال
<style>
.jumbotron {
background-color: #f4511e;
color: #fff;
padding: 100px 25px;
}
.container-fluid {
padding: 60px
50px;
}
</style>نتيجة:
شركة
ونحن متخصصون في blablabla
معلومات عن الشركة الصفحة
أبجد هوز ..
أبجد هوز ..
قيمنا
المهمة: لدينا أبجد هوز مهمة ..
الرؤية: رؤيتنا أبجد هوز ..
إضافة الشبكة
1. إضافة رمز (أو شعار الشركة) إلى كل حاوية.
2. فصل رمز و"حول النص" من خلال خلق عمودين ( .col-sm-8 و .col-sm-4 )
3. إضافة استفسارات وسائل الإعلام لتوسيط "عمود شعار" على شاشات أصغر من 768 بكسل.
مثال
<style>
.logo {
font-size: 200px;
}
@media screen and (max-width: 768px) {
.col-sm-4 {
text-align: center;
margin: 25px 0;
}
}
</style>
<div class="container-fluid">
<div
class="row">
<div class="col-sm-8">
<h2>About Company Page</h2>
<h4>Lorem
ipsum..</h4>
<p>Lorem ipsum..</p>
<button class="btn btn-default btn-lg">Get
in Touch</button>
</div>
<div
class="col-sm-4">
<span
class="glyphicon glyphicon-signal logo"></span>
</div>
</div>
</div>
<div class="container-fluid bg-grey">
<div class="row">
<div class="col-sm-4">
<span class="glyphicon
glyphicon-globe logo"></span>
</div>
<div class="col-sm-8">
<h2>Our Values</h2>
<h4><strong>MISSION:</strong> Our mission lorem ipsum..</h4>
<p><strong>VISION:</strong> Our vision Lorem ipsum..</p>
</div>
</div>
</div>نتيجة:
معلومات عن الشركة الصفحة
أبجد هوز ..
أبجد هوز ..
قيمنا
المهمة: لدينا أبجد هوز مهمة ..
الرؤية: رؤيتنا أبجد هوز ..
إضافة الحاويات الخدمات
إضافة حاويات جديدة، مع أعمدة 2X3 متساوية العرض ( .col-sm-4 ):
مثال
<div class="container-fluid text-center">
<h2>SERVICES</h2>
<h4>What we offer</h4>
<br>
<div class="row">
<div class="col-sm-4">
<span class="glyphicon
glyphicon-off"></span>
<h4>POWER</h4>
<p>Lorem ipsum dolor sit amet..</p>
</div>
<div class="col-sm-4">
<span class="glyphicon
glyphicon-heart"></span>
<h4>LOVE</h4>
<p>Lorem ipsum dolor sit amet..</p>
</div>
<div class="col-sm-4">
<span class="glyphicon
glyphicon-lock"></span>
<h4>JOB DONE</h4>
<p>Lorem ipsum dolor sit amet..</p>
</div>
</div>
<br><br>
<div class="row">
<div class="col-sm-4">
<span class="glyphicon
glyphicon-leaf"></span>
<h4>GREEN</h4>
<p>Lorem ipsum dolor sit amet..</p>
</div>
<div class="col-sm-4">
<span class="glyphicon
glyphicon-certificate"></span>
<h4>CERTIFIED</h4>
<p>Lorem ipsum dolor
sit amet..</p>
</div>
<div
class="col-sm-4">
<span class="glyphicon
glyphicon-wrench"></span>
<h4>HARD
WORK</h4>
<p>Lorem ipsum dolor sit amet..</p>
</div>
</div>
</div>
نتيجة:
خدمات
ما نقدمه
قوة
أبجد هوز دولور الجلوس امات..
حب
أبجد هوز دولور الجلوس امات..
تم إنجاز المهمة
أبجد هوز دولور الجلوس امات..
أخضر
أبجد هوز دولور الجلوس امات..
معتمد
أبجد هوز دولور الجلوس امات..
عمل صعب
أبجد هوز دولور الجلوس امات..
التصميم الأيقونات
إضافة فئة مخصصة ( .logo-small ) إلى كل glyphicon في الحاوية "الخدمات". استخدام CSS أسلوب لهم:
مثال
/* Add an orange color to all icons and set the font-size */
.logo-small
{
color: #f4511e;
font-size:
50px;
}
.logo
{
color: #f4511e;
font-size:
200px;
}
نتيجة:
معلومات عن الشركة الصفحة
أبجد هوز ..
أبجد هوز ..
قيمنا
المهمة: لدينا أبجد هوز مهمة ..
الرؤية: رؤيتنا أبجد هوز ..
خدمات
ما نقدمه
قوة
أبجد هوز دولور الجلوس امات..
حب
أبجد هوز دولور الجلوس امات..
تم إنجاز المهمة
أبجد هوز دولور الجلوس امات..
أخضر
أبجد هوز دولور الجلوس امات..
معتمد
أبجد هوز دولور الجلوس امات..
عمل صعب
أبجد هوز دولور الجلوس امات..
إضافة المحفظة الحاويات
إنشاء حاوية كاملة العرض الجديدة، مع ثلاثة أعمدة متساوية العرض ( .col-sm-4 ):
داخل كل عمود، إضافة صورة.
ثم، استخدم .img-thumbnail فئة لتشكيل صورة إلى صورة مصغرة.
عادة، إضافة .img-thumbnail الطبقة مباشرة إلى عنصر <IMG>. في هذا المثال، وضعنا وعاء مصغرة حول الصورة، حتى نتمكن من تحديد النص صورة أيضا.
مثال
<div class="container-fluid text-center bg-grey">
<h2>Portfolio</h2>
<h4>What we have created</h4>
<div
class="row text-center">
<div class="col-sm-4">
<div class="thumbnail">
<img
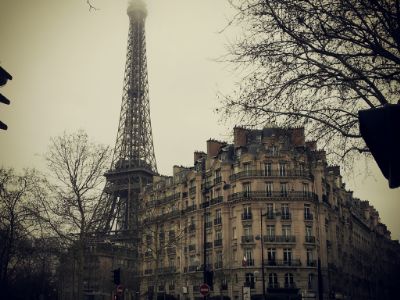
src="paris.jpg" alt="Paris">
<p><strong>Paris</strong></p>
<p>Yes, we built Paris</p>
</div>
</div>
<div class="col-sm-4">
<div class="thumbnail">
<img
src="newyork.jpg" alt="New York">
<p><strong>New York</strong></p>
<p>We built New York</p>
</div>
</div>
<div
class="col-sm-4">
<div class="thumbnail">
<img src="sanfran.jpg" alt="San Francisco">
<p><strong>San Francisco</strong></p>
<p>Yes, San Fran is ours</p>
</div>
</div>
</div>
نتيجة:
محفظة
ما الذي بنيناه
باريس
نعم، قمنا ببناء باريس

نيويورك
بنينا نيويورك

سان فرانسيسكو
نعم، سان فران هو لنا
صور التصميم صورة مصغرة
استخدام CSS أسلوب الصور. في مثالنا، حاولنا جعلها تبدو وكأنها بطاقات، عن طريق إزالة الحدود بين البلدين، ووضع العرض بنسبة 100٪ على كل صورة.
مثال
.thumbnail {
padding: 0 0 15px 0;
border: none;
border-radius: 0;
}
.thumbnail img {
width: 100%;
height: 100%;
margin-bottom: 10px;
}
نتيجة:
محفظة
ما الذي بنيناه
باريس
نعم، قمنا ببناء باريس
نيويورك
بنينا نيويورك
سان فرانسيسكو
نعم، سان فران هو لنا
إضافة كاروسيل
إضافة دائري:
مثال
<h2>What our customers say</h2>
<div id="myCarousel" class="carousel
slide text-center" data-ride="carousel">
<!-- Indicators -->
<ol class="carousel-indicators">
<li data-target="#myCarousel"
data-slide-to="0" class="active"></li>
<li
data-target="#myCarousel" data-slide-to="1"></li>
<li
data-target="#myCarousel" data-slide-to="2"></li>
</ol>
<!-- Wrapper for slides -->
<div class="carousel-inner" role="listbox">
<div class="item active">
<h4>"This company is the
best. I am so happy with the result!"<br><span style="font-style:normal;">Michael
Roe, Vice President, Comment Box</span></h4>
</div>
<div class="item">
<h4>"One word...
WOW!!"<br><span style="font-style:normal;">John Doe, Salesman, Rep Inc</span></h4>
</div>
<div class="item">
<h4>"Could I... BE any more happy with this company?"<br><span style="font-style:normal;">Chandler
Bing, Actor, FriendsAlot</span></h4>
</div>
</div>
<!-- Left and right controls -->
<a
class="left carousel-control" href="#myCarousel" role="button" data-slide="prev">
<span class="glyphicon glyphicon-chevron-left" aria-hidden="true"></span>
<span class="sr-only">Previous</span>
</a>
<a
class="right carousel-control" href="#myCarousel" role="button"
data-slide="next">
<span class="glyphicon glyphicon-chevron-right"
aria-hidden="true"></span>
<span class="sr-only">Next</span>
</a>
</div>نتيجة:
ماذا يقول عملائنا
انها محاولة لنفسك »نمط دائري
استخدام CSS أسلوب دائري:
مثال
.carousel-control.right, .carousel-control.left {
background-image: none;
color:
#f4511e;
}
.carousel-indicators li {
border-color: #f4511e;
}
.carousel-indicators li.active {
background-color: #f4511e;
}
.item h4 {
font-size: 19px;
line-height: 1.375em;
font-weight: 400;
font-style: italic;
margin: 70px 0;
}
.item
span {
font-style: normal;
}نتيجة:
ماذا يقول عملائنا
انها محاولة لنفسك »إضافة التسعير الحاويات
إنشاء حاوية عرض كامل، مع ثلاثة أعمدة متساوية العرض ( .col-sm-4 ):
داخل كل عمود، إضافة لوحة:
مثال
<div class="container-fluid">
<div class="text-center">
<h2>Pricing</h2>
<h4>Choose a payment plan that works
for you</h4>
</div>
<div class="row">
<div class="col-sm-4">
<div
class="panel panel-default text-center">
<div class="panel-heading">
<h1>Basic</h1>
</div>
<div class="panel-body">
<p><strong>20</strong> Lorem</p>
<p><strong>15</strong> Ipsum</p>
<p><strong>5</strong> Dolor</p>
<p><strong>2</strong> Sit</p>
<p><strong>Endless</strong> Amet</p>
</div>
<div
class="panel-footer">
<h3>$19</h3>
<h4>per month</h4>
<button class="btn btn-lg">Sign Up</button>
</div>
</div>
</div>
<div class="col-sm-4">
<div class="panel panel-default text-center">
<div class="panel-heading">
<h1>Pro</h1>
</div>
<div class="panel-body">
<p><strong>50</strong> Lorem</p>
<p><strong>25</strong> Ipsum</p>
<p><strong>10</strong> Dolor</p>
<p><strong>5</strong> Sit</p>
<p><strong>Endless</strong> Amet</p>
</div>
<div
class="panel-footer">
<h3>$29</h3>
<h4>per month</h4>
<button class="btn btn-lg">Sign Up</button>
</div>
</div>
</div>
<div class="col-sm-4">
<div class="panel panel-default text-center">
<div class="panel-heading">
<h1>Premium</h1>
</div>
<div class="panel-body">
<p><strong>100</strong> Lorem</p>
<p><strong>50</strong> Ipsum</p>
<p><strong>25</strong> Dolor</p>
<p><strong>10</strong> Sit</p>
<p><strong>Endless</strong> Amet</p>
</div>
<div
class="panel-footer">
<h3>$49</h3>
<h4>per month</h4>
<button class="btn btn-lg">Sign Up</button>
</div>
</div>
</div>
</div>
</div>
نتيجة:
التسعير
اختيار خطة الدفع التي يعمل للكم
الأساسية
20 أبجد
15 هوز
5 دولور
2 اجلس
التي لا نهاية لها امات
برو
50 أبجد
25 هوز
10 دولور
5 الجلوس
التي لا نهاية لها امات
الممتازة
100 أبجد
50 هوز
25 دولور
10 اجلس
التي لا نهاية لها امات
لوحات التصميم
استخدام CSS أسلوب لوحات:
مثال
.panel {
border: 1px solid #f4511e;
border-radius:0;
transition: box-shadow
0.5s;
}
.panel:hover {
box-shadow: 5px 0px
40px rgba(0,0,0, .2);
}
.panel-footer .btn:hover {
border: 1px solid #f4511e;
background-color: #fff
!important;
color: #f4511e;
}
.panel-heading
{
color: #fff !important;
background-color: #f4511e !important;
padding: 25px;
border-bottom: 1px solid transparent;
border-top-left-radius: 0px;
border-top-right-radius:
0px;
border-bottom-left-radius: 0px;
border-bottom-right-radius: 0px;
}
.panel-footer {
background-color:
#fff !important;
}
.panel-footer h3 {
font-size: 32px;
}
.panel-footer h4 {
color: #aaa;
font-size: 14px;
}
.panel-footer .btn {
margin:
15px 0;
background-color: #f4511e;
color: #fff;
}
نتيجة:
التسعير
اختيار خطة الدفع التي يعمل للكم
الأساسية
20 أبجد
15 هوز
5 دولور
2 اجلس
التي لا نهاية لها امات
برو
50 أبجد
25 هوز
10 دولور
5 الجلوس
التي لا نهاية لها امات
الممتازة
100 أبجد
50 هوز
25 دولور
10 اجلس
التي لا نهاية لها امات
إضافة جهة اتصال الحاويات
إضافة جديدة للحاويات مع المعلومات يرجى الاتصال ب:
مثال
<div class="container-fluid bg-grey">
<h2
class="text-center">CONTACT</h2>
<div class="row">
<div
class="col-sm-5">
<p>Contact us and we'll get back to you
within 24 hours.</p>
<p><span class="glyphicon glyphicon-map-marker"></span>
Chicago, US</p>
<p><span class="glyphicon glyphicon-phone"></span> +00 1515151515</p>
<p><span class="glyphicon glyphicon-envelope"></span>
[email protected]</p>
</div>
<div class="col-sm-7">
<div class="row">
<div class="col-sm-6
form-group">
<input class="form-control" id="name" name="name"
placeholder="Name" type="text" required>
</div>
<div class="col-sm-6
form-group">
<input class="form-control" id="email" name="email"
placeholder="Email" type="email" required>
</div>
</div>
<textarea class="form-control" id="comments" name="comments"
placeholder="Comment" rows="5"></textarea><br>
<div class="row">
<div class="col-sm-12 form-group">
<button class="btn btn-default pull-right"
type="submit">Send</button>
</div>
</div>
</div>
</div>
</div>نتيجة:
اتصال
الاتصال بنا، ونحن سوف نعود اليكم في غضون 24 ساعة.
شيكاغو، الولايات المتحدة
+00 1515151515
إضافة خرائط جوجل
إضافة خرائط جوجل (لمزيد من المعلومات، يرجى الاطلاع على خرائط جوجل Tutoria ل):
مثال
<!-- Set height and width with CSS -->
<div id="googleMap" style="height:400px;width:100%;"></div>
<!-- Add Google Maps -->
<script src="http://maps.googleapis.com/maps/api/js"></script>
<script>
var myCenter = new google.maps.LatLng(41.878114, -87.629798);
function initialize() {
var mapProp = {
center:myCenter,
zoom:12,
scrollwheel:false,
draggable:false,
mapTypeId:google.maps.MapTypeId.ROADMAP
};
var map = new
google.maps.Map(document.getElementById("googleMap"),mapProp);
var
marker = new google.maps.Marker({
position:myCenter,
});
marker.setMap(map);
}
google.maps.event.addDomListener(window,
'load', initialize);
</script>نتيجة:
انها محاولة لنفسك »إضافة نافبار
إضافة نافبار في الجزء العلوي من الصفحة التي تنهار على شاشات أصغر حجما:
مثال
<nav class="navbar navbar-default
navbar-fixed-top">
<div class="container">
<div class="navbar-header">
<button type="button" class="navbar-toggle"
data-toggle="collapse" data-target="#myNavbar">
<span
class="icon-bar"></span>
<span class="icon-bar"></span>
<span
class="icon-bar"></span>
</button>
<a class="navbar-brand" href="#">Logo</a>
</div>
<div class="collapse navbar-collapse" id="myNavbar">
<ul
class="nav navbar-nav navbar-right">
<li><a href="#about">ABOUT</a></li>
<li><a href="#services">SERVICES</a></li>
<li><a href="#portfolio">PORTFOLIO</a></li>
<li><a href="#pricing">PRICING</a></li>
<li><a href="#contact">CONTACT</a></li>
</ul>
</div>
</div>
</nav>نتيجة:
انها محاولة لنفسك » | نصيحة: بزر الماوس الأيمن محاذاة أزرار التنقل مع navbar-right الطبقة. |
|---|
إن أسلوب نافبار
استخدام CSS لتخصيص شريط التنقل:
مثال
.navbar {
margin-bottom: 0;
background-color: #f4511e;
z-index: 9999;
border: 0;
font-size: 12px !important;
line-height: 1.42857143 !important;
letter-spacing:
4px;
border-radius: 0;
}
.navbar li a, .navbar
.navbar-brand {
color: #fff !important;
}
.navbar-nav li a:hover, .navbar-nav
li.active a {
color: #f4511e !important;
background-color: #fff !important;
}
.navbar-default .navbar-toggle
{
border-color: transparent;
color: #fff !important;
}نتيجة:
انها محاولة لنفسك »إضافة Scrollspy
إضافة scrollspy تحديث الارتباطات نافبار تلقائيا عند التمرير:
مثال
<body id="myPage" data-spy="scroll" data-target=".navbar" data-offset="60">
<div id="about" class="container-fluid">
<div id="services"
class="container-fluid">
<div id="portfolio" class="container-fluid">
<div id="pricing" class="container-fluid">
<div id="contact"
class="container-fluid"> انها محاولة لنفسك » إضافة تذييل
إضافة "سهم لأعلى" رمز لتذييل، والتي سوف تأخذ المستخدم إلى أعلى الصفحة عند النقر على:
مثال
<style>
footer .glyphicon {
font-size: 20px;
margin-bottom: 20px;
color:
#f4511e;
}
</style>
<footer class="container-fluid text-center">
<a href="#myPage" title="To Top">
<span class="glyphicon
glyphicon-chevron-up"></span>
</a>
<p>Bootstrap Theme
Made By <a href="http://www.w3ii.com"
title="Visit w3ii">www.w3ii.com</a></p>
</footer>نتيجة:
انها محاولة لنفسك »مضيفا التمرير السلس
استخدام مسج لإضافة التمرير السلس (عند النقر على الروابط في الناف بار):
مثال
<script>
$(document).ready(function(){
// Add
smooth scrolling to all links in navbar + footer link
$(".navbar
a, footer a[href='#myPage']").on('click', function(event) {
// Prevent default anchor
click behavior
event.preventDefault();
// Store hash
var hash =
this.hash;
// Using jQuery's animate() method to add smooth page
scroll
// The optional number (900) specifies the number of milliseconds
it takes to scroll to the specified area
$('html, body').animate({
scrollTop: $(hash).offset().top
}, 900, function(){
// Add hash
(#) to URL when done scrolling (default click behavior)
window.location.hash = hash;
});
});
})
</script> انها محاولة لنفسك » اللمسة الأخيرة
إضفاء الطابع الشخصي على الموضوع الخاص بك عن طريق إضافة الخط الذي تريد. وقد استخدمنا "مونتسيرات" و "لاتو" من مكتبة الخط جوجل.
تصل إلى الخط في <head> القسم:
<link href="http://fonts.googleapis.com/css?family=Montserrat" rel="stylesheet" type="text/css">
<link href="http://fonts.googleapis.com/css?family=Lato" rel="stylesheet" type="text/css">
ثم يمكنك استخدامها في الصفحة:
مثال
body {
font: 400 15px Lato, sans-serif;
line-height: 1.8;
color: #818181;
}
.jumbotron {
font-family: Montserrat,
sans-serif;
}
.navbar {
font-family:
Montserrat, sans-serif;
}واضاف لدينا أيضا بعض أسلوب اضافية لبعض العناصر:
مثال
h2 {
font-size: 24px;
text-transform: uppercase;
color: #303030;
font-weight: 600;
margin-bottom: 30px;
}
h4 {
font-size: 19px;
line-height: 1.375em;
color: #303030;
font-weight: 400;
margin-bottom: 30px;
} انها محاولة لنفسك » شريحة وعناصر
لقد أنشأنا أيضا تأثير الرسوم المتحركة التي سوف تنزلق داخل العناصر في التمرير. إذا كنت ترغب في استخدامه، فقط إضافة .slideanim فئة إلى عنصر تريد الانزلاق في، وإضافة ما يلي إلى CSS ومسج (لا تتردد في تعديل المدة، والتعتيم، من أين تبدأ، عندما الانزلاق في، وما إلى ذلك وهلم جرا):
CSS مثال
.slideanim {visibility:hidden;}
.slide {
/* The
name of the animation */
animation-name: slide;
-webkit-animation-name: slide;
/* The duration of the
animation */
animation-duration: 1s;
-webkit-animation-duration:
1s;
/* Make the element visible */
visibility: visible;
}
/* Go from 0% to 100% opacity (see-through) and specify the percentage
from when to slide in the element along the Y-axis */
@keyframes slide {
0% {
opacity: 0;
-webkit-transform: translateY(70%);
}
100% {
opacity: 1;
-webkit-transform: translateY(0%);
}
}
@-webkit-keyframes
slide {
0% {
opacity: 0;
-webkit-transform: translateY(70%);
}
100% {
opacity: 1;
-webkit-transform: translateY(0%);
}
}مسج مثال
$(window).scroll(function() {
$(".slideanim").each(function(){
var pos = $(this).offset().top;
var winTop =
$(window).scrollTop();
if (pos < winTop + 600) {
$(this).addClass("slide");
}
});
}); انها محاولة لنفسك »